Sunday, May 4, 2014

Questioning During Reading

At the beginning of the year, I like to start off reading by talking about how smart readers question what they read.  We spend the month learning exactly how to create a question in our minds.  Fiction Reading Power and Nonfiction Reading Power by Adrienne Gear are excellent resources for teaching strategies for questioning. 


SOO...now is a great time to review questioning and see how far we have come as smart readers! The kids LOVE  to use stickies and I have found yet another way to use those small, colorful squares.  Since we spend the month of April talking about Earth awareness I chose to read Wump World by Rickard Pack aloud to the kids.  I began the reading time by reviewing:
 The reasons we ask questions: 
~If you are curious about something
~If you want to predict what will happen
~If you want to make something clear.

I gave each student a small sticky note and told them that whenever they had a question about the story to write it down on the sticky note and I would stick it to the page in the book.  As I read the book, they were full of questions!  By the end, the book was filled with sticky notes.  It was great~ We then discussed whether those questions were ever answered and if the questions even mattered.  It was fun to watch the look on their faces when they discovered that some questions never get answered and some don't even matter at all!  What kinds of questioning strategies do you use in your classroom to get the kids thinking?  I would love to hear the ideas!

                                                                                                                                                Happy Teaching,
                                                                                                                                                  Emily

http://www.teacherspayteachers.com/Product/Questioning-with-Fiction-and-Nonfiction-3-Lessons-Games-and-MoreFUN-1227234


Go Shopping!!


Let's celebrate Teachers with a huge TPT teacher appreciation sale!  Everything in my store is 20% plus get some extra savings with the promo code below.   Let's make the most of the remainder of the year and get some fun things our students will be excited to do.  Ready, set, GO SHOPPING!

http://www.teacherspayteachers.com/Store/Big-Ideas-In-Teaching

Thursday, March 6, 2014

Sticky Note Summaries

    I have been working like crazy trying to get the low babies in my intervention group to remember what they have read.  We have been doing some close reading passages and drawing pictures to help us visualize each paragraph.  It was really helpful!  This week we were working on a leveled reader with sticky notes.  They LOVE writing on those bright little squares!  When I can keep their attention, I know I am doing something right.
     This week we practiced summarizing a story with sticky notes.  We discussed that when we summarize we find only the most important details.  After the kids read every two pages I had them summarize it in only one sentence.  At the beginning, they wanted to use the first sentence as their summary.  Then they wanted to say many sentences.  But once they realized it could only be one sentence they quickly caught on!
    The next time we met, I had the kids take the sticky notes off and put them onto the graphic organizer.  They loved this part!  Once they were all stuck on I had the kids read aloud the sticky notes in order.  It helped them see if all the important parts were there.  We read it several times to practice fluency too. 
    
     Now comes the thinking part!  The kids had to summarize the story in three to four sentences.  Condensing their sticky notes took a bit of time, but I was amazed with what they came up with!  They truly showed deep understanding of the story!
      The kids are begging to do this activity again, so it must be a winner.  Tomorrow I am going to try using sticky notes to go back and site evidence...wish me luck!  If you would like this free activity, please click on the picture to be linked to my TPT store.

Click on Picture 
                  
Sticky Note Summary

                                                                                                   Happy Teaching,
                                                                                                    Emily


Friday, February 21, 2014

FInding Evidence in Text

     This year I have really been focusing on helping my kids discover how to go back into the text to help find information.  I can't tell you how many times I have heard "Well I THINK the answer is..." Now there is finally a tool to make sure they go back into the text to prove it.  Everywhere on the blogs I visit and on TPT I kept seeing close reading.  How is it that the is a new term to me??  After reading much more about it, made me realize that I do most of the components already...shew!  Close reading is a super strategy to get the kids to rediscover the text in a whole new way. 
     I also created a graphic organizer to go along with close reading.  I told the kids they were kind of like lawyers who had to prove a case before me (the judge!) could rule that the answer was correct or not.  They ATE IT UP!!!  What is so great about this is that you as the teacher get to choose only one question the kids should focus on.  I used this with many different kinds of texts from fiction to nonfiction and it works great with them all.  This graphic organizer is fantastic at getting the kids to go back and find proof to back up their thinking. I was super impressed, even the first time.  I can't wait to watch them grow as lawyers...I mean independent readers:) This graphic organizer is a also free download from my TPT store. Click on the click here button below to be directed to my site, download, and be prepared to be amazed!
                                                                                                                                 Enjoy,
                                                                                                                                 Emily


Friday, February 7, 2014

Valentine's Day Evidence Based Reading Activites FREEBIE


Who doesn't like a freebie?!  Common Core is really pushing kids to dig deeper into the text.  My old Valentine's Day centers were just not cutting it.  I'll admit it, they were fluffy.  Thanks to three days off due to 7 inches of snow, I have created some fun evidence based reading activities.  I have been really pushing my third graders to compare texts and analyze what they have in common.  In this packet the kids will read two different passages about valentine traditions in other countries.  They will then fill in a great graphic organizer to compare the two countries.  I think the kids will really enjoy reading about how other countries celebrate Valentine's Day.  The kids also have been LOVING color coding evidence from the text.  I have created two stories where the students will color code the answers.  Shout out to my daughter Evelyn who was my inspiration for one of the texts!!  Finally, you will find a fun writing activity.  Please enjoy and have a very happy Valentine's Day!                                          


                                                 Click here

Wednesday, February 5, 2014

School's Out...Again!


Thanks to Mother Nature we have our THIRD snow day in a row!  While I love, love, love being at home with my 4 darlings (mess makers, whiners, eaters) I am ready to get back into the school routine.  I do have to admit I have been working a bit. I have spent these last two days opening up a Teacher's Notebook site and creating a few Valentine's Day activities.  There was a ton of play though.  My kids wanted to go sledding on a giant hill at our local park.  It was fun to watching think flying down with giant smiles.  They ended up spending almost three hours sledding!  We also got a new board game too. Conferences are in a week and a half.  This year my new school does student led conferences.  I have to admit these scare me a little.  I have never had my students lead conferences before.  I picked up some wonderful things on TPT to help me get ready but I would love ideas.  My team decided to have the kids create "Show Me Boards" using foam poster boards.  Once school is back in session we are really going to have to get booking it!  If you have student led conferences, what do you have the kids show and say?  I could really use some help! 


Sunday, February 2, 2014

We Built a Zoo Area and Perimeter


Our conferences are quickly approaching and this is the first year I will be having my students conduct student led conferences...yikes!!
The kids will be creating show me boards. One of my brilliant team mates came up with the idea of having the kids create an area and perimeter zoo to put on the board.  I took her ideas and created a SUPER CUTE activity!  My kids began by coloring zoo animals and laying them on centimeter grid paper. The kids then started drawing the exhibits. 
 

Once all the exhibits were outlined, the kids cut them out.  Now came some thinking!  I showed the kids that the area of shapes can be found by breaking the figure up into small squares and rectangles. I had them add up the rectangles on the back of the animal picture and then write the area in square cm. on the back of the grid shape.  This took them some time, but they were having so much fun. 

They then counted the perimeter.  They had a label for each animal to write the measurements on. Now comes the fun part...creating the zoo!  I game them a label to color and a 12x18 piece of black construction paper.  Let me tell you, they turned out SO CUTE!! It also totally bumped up the rigor and relevance...which, as we know, is very important! The kids are going to LOVE showing their parents the zoos at conferences. 

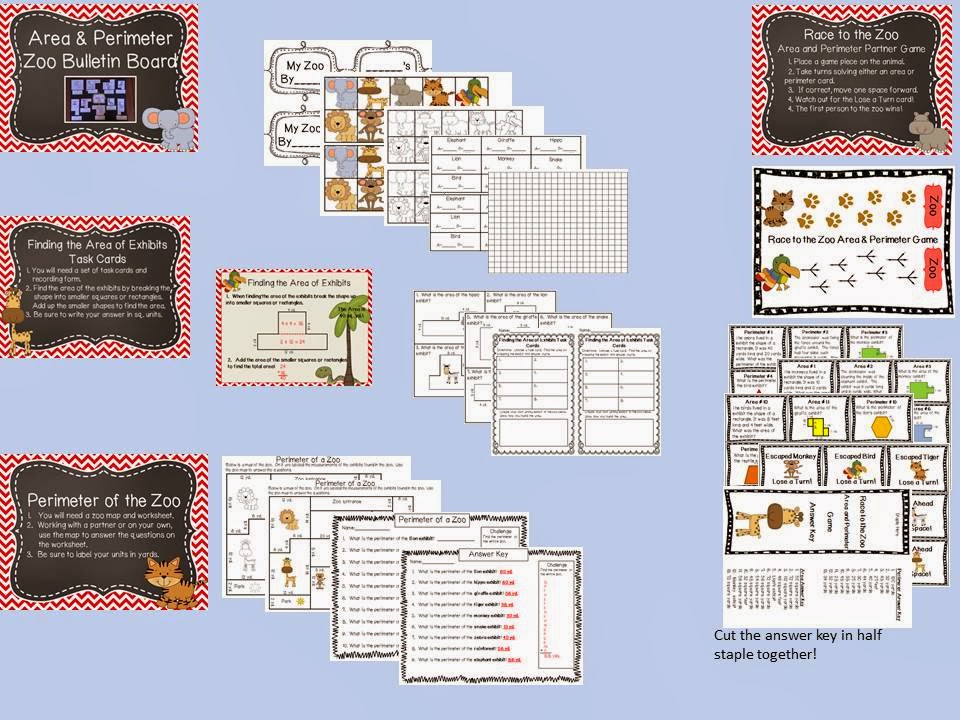
I also created some fun area and perimeter "zoo" activities that the kids worked on in math.  Go check out the lesson and games at my TPT store.  I just know they will be the perfect addition to your area and perimeter plans.  Click on the picture to be linked to my store.
We Built a Zoo Area and Perimeter

Area and Perimeter Fun


Last week I introduced area and perimeter to my third graders.  It seemed like they were catching on when it came to rectangles and squares but they just were not getting the irregular shaped figures.  I ditched my regular plans and just went with an idea that popped into my head at the beginning of math.  It turned out to be awesome and the kids were eating it up!!


My BIG objective was to have the kids understand that the perimeter can change when the area remains the same. 


I first started the lesson by having the kids draw a 8x3 rectangle.  We talked about finding the area with the formula Length x Width.  They wrote the area under the figure.  The kids then counted the perimeter and wrote it.  They then drew a 6 x 4 rectangle and discovered that the perimeter was different!!  How did that happen?!  Finally they drew and irregular polygon with and area of 24. I just has the kids count out 24 squares.  They really had fun with this. Since everyone had a different shape, the kids worked with a partner to find each other's perimeter.  By this time they were fascinated!


After the kids learned that the perimeters change, I had them create four closed figures with the areas of 12 sq. cm, 20 sq. cm, 28 sq. cm, and 36 sq. cm.  I told them that at least two of these figures needed to be irregular shaped figures.  They were so excited!!  Once all the figures were drawn, they cut them out.
 

I put posters around the room and had the kids glue their figures on the correct posters.  Since I literally changed my plans at the last minutesand came up with this lesson, I had to hand write the words.  Next time I will create a title on the computer and glue it on each poster.  But it turned out well!  Tomorrow I PLAN to hang the posters around the room and have the kids visit each one to find the perimeters of each figure.  We might even have a contest to figure out which figure has the largest perimeter!  
This lesson was a perfect hands on lesson to teach area and perimeter!